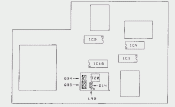
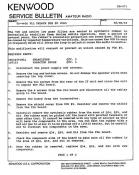
The VCO and active low pass filter are sealed in synthetic rubber to mechanically stabilize them during mobile operation. Over a period
of several years, the rubber's insulation properties can break down. This may be caused be repeated temperature variations. This can
cause the VCO to vary in frequency which will force the loop to unlock or cause the audio to warble.
This modification will correct or prevent an unlock caused be VCO #5.
Required parts:
2SC2459(BL) Transistor QTY. 2
1SV153 Varactor diode QTY. 1
1. Disconnect the power supply and antenna.
2. Remove the top and bottom covers. Do not damage the speaker wires when removing the top cover.
3. Remove the two screws from the rear of the IF unit and raise the unit to expose the PLL board.
4. Remove the 8 screws from the PLL board and disconnect all the cables going to the board.
5. Remove the board from the transceiver.
6. Remove the shield cover from VCO #5. Desolder and remove the shield from the PLL board.
7. Carefully remove the synthetic rubber from the area of Q34, Q35, and D14. The rubber must be picked off the board with pointed
tweezers or some other tool. It cannot be removed with any type of solvent as this will harm the components in the area.
8. Desolder and remove Q34, Q35, and D14 from the PLL board.
9. Check the component side of the board to make sure all the rubber in the area of Q34, Q35, and D14 is removed.
10. Once the rubber is removed, replace Q34, Q35 and D14 with new components.
11. Inspect and resolder the foil side of the PLL board under VCO #5.
12. Install the VCO shield on the PLL board and solder it in place.
13. Seal the VCO with hot melt glue (glue stick used in a hot melt glue gun). Apply the glue to the circuit from the glue gun. Once
the area i covered, use the hot air gun to flow the glue around the components. Do not overheat the components.
14. Install the PLL board in the transceiver.
15. Apply power to the transceiver and allow it to run in receive for about a half hour so the transceiver's temperature stabilizes.
16. Set the operating frequency to 14.200 MHz.
17. Adjust T20 to obtain 5 Vdc at TP11 (the exposed lead of L40) measured with a DVM or VTVM. Do not use a VOM. After adjusting
the VCO, bench run the transceiver for an hour or more to make sure the circuit is stable.
18. Assemble the transceiver.
Image
Time required to perform this modification is 1 hour or less.
GW1NGL NA7KR Kevin Roberts Ham Radio
Page last updated on 09/10/2012 by Kevin Roberts NA7KR a colection of Ham Radio and Electronic Information


